Are you ready to dive into the exciting world of parallel computing? This comprehensive guide will walk you through the process of building a powerful 32-core Raspberry Pi cluster from scratch. Whether you're a curious hobbyist, an ambitious student, or a professional looking to experiment with distributed systems, this project will provide invaluable hands-on experience and lay a solid foundation for your future endeavors in the realm of high-performance computing.
Why Build a Raspberry Pi Cluster?
Before we delve into the technical details, let's explore the compelling reasons why building a Raspberry Pi cluster is such an enticing project for tech enthusiasts. The Raspberry Pi, a credit card-sized single-board computer, has revolutionized the way we approach computing projects. Its low cost, versatility, and robust community support make it an ideal platform for experimenting with cluster computing concepts.
One of the primary advantages of building a Raspberry Pi cluster is its cost-effectiveness. Traditional server hardware can be prohibitively expensive, especially for individuals or small organizations looking to learn about distributed systems. In contrast, Raspberry Pis offer an affordable entry point into the world of cluster computing. This accessibility allows enthusiasts to gain practical experience without breaking the bank, making it an excellent option for educational institutions and self-learners alike.
Scalability is another key benefit of Raspberry Pi clusters. You can start small, perhaps with just a few nodes, and gradually expand your cluster as your needs grow or your budget allows. This flexibility is particularly valuable for those who want to learn incrementally or adapt their setup to evolving project requirements.
Energy efficiency is a crucial consideration in modern computing, and Raspberry Pi clusters excel in this area. Compared to traditional server hardware, these clusters consume significantly less power. This not only reduces operating costs but also makes them an environmentally friendly choice for small to medium-scale computing tasks.
The versatility of Raspberry Pi clusters is truly remarkable. From web hosting and network-attached storage to distributed computing tasks and IoT (Internet of Things) applications, the potential use cases are limited only by your imagination. This adaptability makes them an excellent platform for a wide range of projects and experiments.
Perhaps most importantly, building a Raspberry Pi cluster provides hands-on experience that is invaluable in today's tech-driven world. You'll gain practical skills in Linux administration, networking, and distributed systems – all of which are highly sought after in the IT industry. This project serves as a microcosm of larger-scale cluster deployments, offering insights into the challenges and solutions encountered in enterprise-level setups.
What You'll Need
To build our 32-core cluster, we'll be using 8 Raspberry Pi 4 Model B boards, each equipped with a quad-core ARM Cortex-A72 processor. Here's a detailed list of components you'll need to gather:
- 8 x Raspberry Pi 4 Model B (8GB RAM): The latest and most powerful Raspberry Pi model, providing ample processing power and memory for our cluster.
- 8 x MicroSD cards (64GB or larger): These will serve as the primary storage for each Pi, hosting the operating system and applications.
- 1 x 10-port USB charging hub (60W or higher): This will provide centralized power distribution for all the Pis in the cluster.
- 8 x Short USB-C cables: For connecting each Pi to the charging hub.
- 1 x Network switch (8-port Gigabit Ethernet): This will facilitate high-speed communication between the Pis.
- 8 x Short Ethernet cables: To connect each Pi to the network switch.
- 1 x Cluster case (stackable, with cooling fans): A dedicated case will not only organize your cluster but also provide essential cooling.
- 1 x MicroSD card reader: For preparing the operating systems on your computer.
Optional but recommended components include:
- 1 x UPS (Uninterruptible Power Supply): This will protect your cluster from power fluctuations and outages.
- 1 x Keyboard, mouse, and monitor: Useful for initial setup and troubleshooting, though most operations can be done remotely once the cluster is configured.
Step 1: Preparing the Raspberry Pis
The first step in building our cluster is to prepare each Raspberry Pi with the appropriate operating system and initial configuration. We'll be using Raspberry Pi OS Lite, a minimal version of the official Raspberry Pi operating system based on Debian. This lightweight distribution is ideal for our cluster setup as it conserves resources and provides a clean slate for our specific requirements.
Begin by downloading and installing the Raspberry Pi Imager on your computer. This official tool simplifies the process of writing operating system images to MicroSD cards. Once installed, insert a MicroSD card into your computer's card reader and launch the Raspberry Pi Imager.
In the Raspberry Pi Imager, select "Raspberry Pi OS Lite (64-bit)" as the operating system. This 64-bit version allows us to take full advantage of the Raspberry Pi 4's capabilities. Next, choose your MicroSD card as the target storage device. Before writing the image, click on the settings icon (gear) to access advanced options.
In the advanced options, you'll want to configure several important settings:
- Set the hostname to
rpi01for the first node, incrementing for each subsequent node (e.g.,rpi02,rpi03, etc.). - Enable SSH with password authentication for remote access.
- Set a username and password for the default user account.
- Optionally, configure Wi-Fi settings if you plan to use wireless networking for initial setup.
After configuring these settings, proceed to write the image to the MicroSD card. Repeat this process for all 8 MicroSD cards, remembering to update the hostname for each one.
Once the MicroSD cards are prepared, insert them into each Raspberry Pi and connect the Pis to power. Allow them to boot up, which may take a few minutes for the initial setup. After booting, you can connect to each Pi via SSH using the hostname you configured:
ssh pi@rpi01.local
Replace rpi01 with the appropriate hostname for each Pi.
Upon first connection, it's crucial to update and upgrade the system on each Pi. This ensures you have the latest security patches and software versions. Run the following command on each Pi:
sudo apt update && sudo apt upgrade -y
The next step is to set a static IP address for each Pi. This is important for maintaining consistent network configurations in your cluster. Edit the /etc/dhcpcd.conf file on each Pi:
sudo nano /etc/dhcpcd.conf
Add the following lines at the end of the file, adjusting the IP addresses as needed for your network:
interface eth0
static ip_address=192.168.1.101/24
static routers=192.168.1.1
static domain_name_servers=192.168.1.1 8.8.8.8
After making these changes, reboot each Pi to apply the new network settings:
sudo reboot
Step 2: Assembling the Cluster
With the software preparation complete, it's time to assemble the physical cluster. This step requires careful handling of the components and attention to detail to ensure a stable and efficient setup.
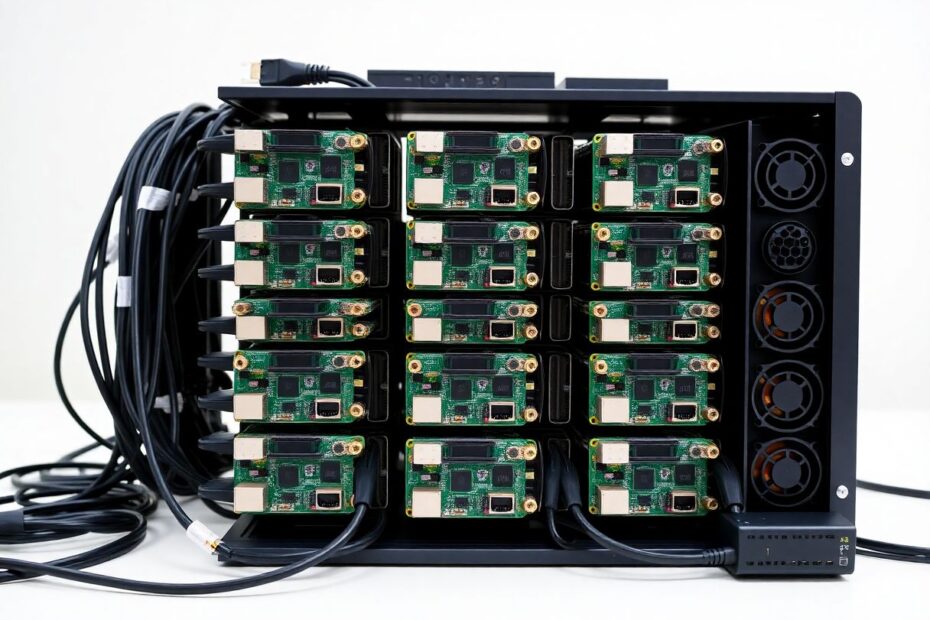
Start by carefully mounting each Raspberry Pi in your cluster case. Many cluster cases designed for Raspberry Pis come with stackable layers and built-in cooling fans, which are crucial for maintaining optimal operating temperatures. Follow the manufacturer's instructions for your specific case, ensuring that each Pi is securely fastened and has adequate ventilation.
Next, connect the Ethernet cables from each Pi to the network switch. Use short cables to minimize clutter and improve airflow within the cluster. The network switch will serve as the central hub for inter-Pi communication, so make sure it's positioned for easy access and good ventilation.
Connect the USB-C power cables from each Pi to the USB charging hub. The charging hub should be capable of delivering sufficient power to all 8 Pis simultaneously. A 60W (or higher) hub is recommended to ensure stable power delivery under load.
If you're using a UPS, connect both the charging hub and network switch to it. This additional layer of protection will help prevent data loss or system instability due to power fluctuations or brief outages.
Once everything is connected, double-check all the connections before powering on the system. Ensure that all cables are securely plugged in and that there's no strain on any of the connectors.
Step 3: Setting Up the Master Node
In a cluster configuration, it's common to designate one node as the master or control node. This node will be responsible for managing the cluster and distributing tasks to the other nodes. For our setup, we'll use rpi01 as the master node.
Begin by SSH'ing into the master node:
ssh pi@192.168.1.101
Once connected, we'll install Ansible, a powerful automation tool that will simplify the management of our cluster. Run the following command:
sudo apt install ansible -y
Ansible uses SSH to communicate with and manage other nodes, so we need to set up SSH key-based authentication. Generate an SSH key pair on the master node:
ssh-keygen -t rsa -b 4096
Next, we'll copy this SSH key to all nodes in the cluster, including the master node itself. This will allow passwordless SSH access from the master to all nodes:
for i in {1..8}; do
  ssh-copy-id pi@192.168.1.10$i
done
Now that we have SSH key authentication set up, we can create an Ansible inventory file. This file will define the structure of our cluster for Ansible. Create and edit the file:
sudo nano /etc/ansible/hosts
Add the following content to the file:
[cluster]
rpi01 ansible_host=192.168.1.101
rpi02 ansible_host=192.168.1.102
rpi03 ansible_host=192.168.1.103
rpi04 ansible_host=192.168.1.104
rpi05 ansible_host=192.168.1.105
rpi06 ansible_host=192.168.1.106
rpi07 ansible_host=192.168.1.107
rpi08 ansible_host=192.168.1.108

[cluster:vars]
ansible_user=pi
This inventory file defines our cluster group and specifies the IP address for each node. The [cluster:vars] section sets the default user for SSH connections.
To test our Ansible configuration, run the following command:
ansible all -m ping
If everything is set up correctly, you should receive a successful ping response from all nodes.
Step 4: Cluster Configuration with Ansible
With Ansible set up, we can now easily manage our entire cluster from the master node. Let's create some useful Ansible playbooks to automate common tasks and ensure consistency across all nodes.
Updating and Upgrading All Nodes
Create a file called update.yml with the following content:
---
- hosts: cluster
  become: yes
  tasks:
    - name: Update apt cache
      apt:
        update_cache: yes

    - name: Upgrade all packages
      apt:
        upgrade: dist
This playbook will update the package cache and upgrade all installed packages on every node in the cluster. To run the playbook, use the command:
ansible-playbook update.yml
Installing Common Software
Create another playbook called install_common.yml:
---
- hosts: cluster
  become: yes
  tasks:
    - name: Install common packages
      apt:
        name:
          - htop
          - iotop
          - iftop
          - nmon
          - git
          - python3-pip
        state: present
This playbook installs a set of useful tools for system monitoring and development. Run it with:
ansible-playbook install_common.yml
Setting Up NTP for Time Synchronization
Accurate time synchronization is crucial for a properly functioning cluster. Create a playbook called setup_ntp.yml:
---
- hosts: cluster
  become: yes
  tasks:
    - name: Install NTP
      apt:
        name: ntp
        state: present

    - name: Ensure NTP is running and enabled
      service:
        name: ntp
        state: started
        enabled: yes
This playbook installs the NTP (Network Time Protocol) service and ensures it's running on all nodes. Execute it with:
ansible-playbook setup_ntp.yml
By using these Ansible playbooks, you can easily maintain and update your entire cluster from a single point of control, ensuring consistency and saving time on repetitive tasks.
Step 5: Testing Your Cluster
Now that our 32-core Raspberry Pi cluster is set up and configured, it's time to put it to the test. We'll explore a couple of ways to validate the functionality and performance of our cluster.
Distributed Stress Testing
One way to ensure all our nodes are working correctly is to run a distributed stress test. We'll use the stress tool for this purpose. First, let's install it on all nodes using Ansible:
ansible cluster -m apt -a "name=stress state=present" --become
Now, we can run a stress test across all nodes simultaneously:
ansible cluster -m shell -a "stress --cpu 4 --io 2 --vm 1 --vm-bytes 128M --timeout 30s" --become
This command will stress the CPU, I/O, and memory on each node for 30 seconds. Monitor the cluster's performance during this test using tools like htop or by checking the temperature of each Pi.
Parallel Computing with MPI
To demonstrate the power of parallel computing on our cluster, let's set up and run a simple MPI (Message Passing Interface) program. MPI is a standardized and portable message-passing system designed to function on parallel computing architectures.
First, install MPI on all nodes:
ansible cluster -m apt -a "name=openmpi-bin state=present" --become
Next, create a simple MPI program. On the master node, create a file called hello_mpi.c with the following content:
#include <mpi.h>
#include <stdio.h>

int main(int argc, char** argv) {
    MPI_Init(NULL, NULL);

    int world_size;
    MPI_Comm_size(MPI_COMM_WORLD, &world_size);

    int world_rank;
    MPI_Comm_rank(MPI_COMM_WORLD, &world_rank);

    char processor_name[MPI_MAX_PROCESSOR_NAME];
    int name_len;
    MPI_Get_processor_name(processor_name, &name_len);

    printf("Hello from processor %s, rank %d out of %d processors\n",
           processor_name, world_rank, world_size);

    MPI_Finalize();
}
Compile the program:
mpicc -o hello_mpi hello_mpi.c
Create a hostfile (cluster_hosts) that specifies the available cores on each node:
rpi01 slots=4
rpi02 slots=4
rpi03 slots=4
rpi04 slots=4
rpi05 slots=4
rpi06 slots=4
rpi07 slots=4
rpi08 slots=4
Now, run the MPI program across the entire cluster:
mpirun -np 32 -hostfile cluster_hosts ./hello_mpi
This command will execute the program using all 32 cores across the 8 Raspberry Pis. You should see output from each core, demonstrating that your cluster is working as a cohesive unit.
Conclusion and Future Directions
Congratulations! You've successfully built and configured a 32-core Raspberry Pi cluster. This powerful yet compact computing platform opens up a world of possibilities for experimentation and learning. Your cluster represents a microcosm of larger-scale distributed systems, providing invaluable hands-on experience with concepts that are directly applicable to enterprise-level deployments.
As you continue to explore the capabilities of your Raspberry Pi cluster, consider diving into more advanced topics:
Kubernetes Orchestration: Set up a Kubernetes cluster to manage containerized applications across your Pis. This will give you experience with one of the most popular container orchestration platforms used in modern cloud computing.
Distributed Databases: Implement a distributed database system like Apache Cassandra or CockroachDB. This will allow you to explore concepts of data distribution, replication, and consistency in a distributed environment.
Render Farm: Transform your cluster into a render farm for 3D graphics or video processing. This is an excellent way to leverage the parallel processing power of your cluster for computationally intensive tasks.
Machine Learning: Use frameworks like TensorFlow or PyTorch to distribute machine learning workloads across your cluster, exploring concepts of distributed training and inference.
Big Data Processing: Set up a Hadoop or Spark cluster to process large datasets, gaining experience with distributed data processing frameworks.
Personal Cloud Storage: Create your own cloud storage solution using software like NextCloud or ownCloud, providing a practical and secure alternative to commercial cloud services.
Web