Hey there, WordPress adventurer! If you‘re looking to take your website‘s navigation to the next level, you‘ve come to the right place. In this guide, we‘ll dive deep into the world of dropdown menus – those magical little submenus that appear when you hover over a navigation link.
But before we get into the nitty-gritty of creating dropdowns, let‘s talk about why they matter.
Why Dropdown Menus Are a Must-Have for Your WordPress Site
Imagine you‘re a visitor exploring a website for the first time. You‘re greeted with a wall of navigation links, each leading to a different section or page. It‘s overwhelming, right? You might not know where to start or how to find what you‘re looking for.
That‘s where dropdown menus come in. By organizing related pages into logical categories and subcategories, dropdowns make it easier for visitors to navigate your site and discover relevant content.
But the benefits don‘t stop there. Implementing user-friendly navigation, including dropdown menus, can also:
- Improve your site‘s usability and user experience
- Reduce bounce rates by helping visitors find what they need
- Boost your SEO by making it easier for search engines to crawl and understand your site structure
In fact, a study by the Nielsen Norman Group found that hidden navigation (like dropdowns) can increase content discoverability by up to 27% compared to plain visible links (Nielsen Norman Group, 2017).
And when it comes to SEO, Google‘s own John Mueller has emphasized the importance of clear website navigation:
"The navigation of a website is important in helping visitors quickly find the content they want. It can also help search engines understand what content the webmaster thinks is important." (Google Search Central, 2021)
So if you want to give your visitors and search engines the best possible experience, implementing thoughtful dropdown navigation is a smart move. Luckily, WordPress makes it pretty easy to do! Let‘s dive in.
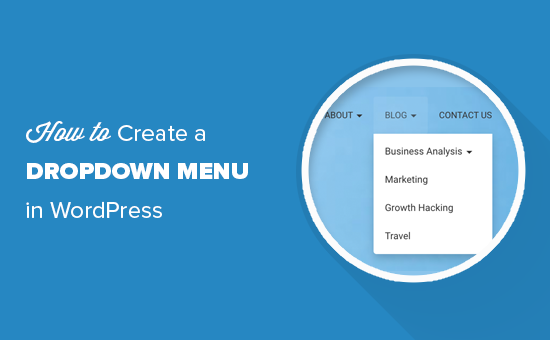
How to Create a Dropdown Menu in WordPress: Two Methods
WordPress offers a couple different ways to create dropdown menus, depending on your preference and the tools available in your theme or plugins. We‘ll walk through both methods step by step.
Method 1: Using the Classic WordPress Menu System
The built-in WordPress menu editor has been the go-to tool for creating navigation menus for years. Here‘s how to use it to whip up a dropdown:
- In your WordPress dashboard, head to Appearance > Menus.
- If you haven‘t created a menu yet, click the create a new menu link at the top of the page, enter a name for your menu, and click the Create Menu button.
- In the left column, you‘ll see your site‘s pages, posts, categories, and custom links. Check the box next to each item you want to include in your menu and click Add to Menu.
- The selected items will appear in the right column under Menu Structure. To create a dropdown, simply drag a menu item slightly to the right to nest it under a top-level item. This converts it to a submenu!
- Repeat the process to build out your dropdown hierarchy. You can create multiple levels of dropdowns by dragging items further to the right.
- Under Menu Settings, select a display location for your menu (like Primary Menu) and click Save Menu.
And just like that, your shiny new dropdown menu is ready to go! But what if you‘re using a block-based WordPress theme? Don‘t worry, we‘ve got you covered there too.
With the release of WordPress 5.9, the block editor gained a powerful new tool for building navigation menus right in your page and template layouts. If your theme supports the new Navigation block, here‘s how you can use it to create dropdowns:
- Open a page or template where you want to add your dropdown menu in the block editor.
- Click the Add Block button (the plus sign) in the top left corner and search for "Navigation". Click on the Navigation block to insert it into your layout.
- In the block settings panel on the right, click the Select Menu dropdown and choose Create New Menu. Enter a name for your menu and click the Create button.
- You‘ll now see an empty Navigation block on your page. Hover over it and click the Add Link button to start building your menu.
- In the popup that appears, select a page, post, category, or custom link to add to the menu. Click the Add to Menu button to place the link.
- To create a submenu item, hover over the parent link and click the Add Submenu button that appears. Then select a destination for the submenu link.
- Continue adding top-level links and submenus until your dropdown structure is complete. You can drag and drop links to rearrange them.
- Use the block settings panel to customize the layout, colors, spacing, and typography of your dropdown menu.
- Click the Save button to save your navigation block and publish or update the page.
The Navigation block brings a whole new level of flexibility to building menus directly in the WordPress editor. Plus, you can reuse the same navigation block on multiple pages or templates for consistent dropdowns across your site.
5 Pro Tips for Designing User-Friendly Dropdown Menus in WordPress
Creating a dropdown menu is one thing – making sure it‘s intuitive and genuinely helpful for your visitors is another. Here are some best practices to keep in mind as you plan and implement your dropdowns:
Keep it simple and shallow. Aim for no more than 2-3 levels of dropdowns to avoid overwhelming visitors. Use clear, concise labels for each menu item.
Use visual cues. Make sure there are visual indicators (like arrows or plus signs) to show which items have submenus. Highlighting the active menu item is also helpful for orientation.
Ensure mobile friendliness. Test your dropdowns on mobile devices to ensure they‘re easy to tap and navigate. Most WordPress themes will automatically convert dropdowns to a mobile menu, but it‘s good to double check.
Enhance with hover states and transitions. Subtle hover effects and smooth transitions can make your dropdowns feel more polished and engaging. Just don‘t go overboard with animation!
Plan for accessibility. Ensure your dropdowns are keyboard-friendly and use proper ARIA markup for screen readers. If you‘re using custom code, follow the W3C‘s WAI-ARIA Authoring Practices for navigation menus.
By putting yourself in your visitors‘ shoes and following these guidelines, you can craft dropdowns that are both stylish and functional.
Styling & Customizing Your WordPress Dropdown Menus
Want to add some extra flair to your dropdown menus? With a little CSS know-how, you can customize the look and feel to perfectly match your site‘s style.
Most WordPress themes will have some built-in options for adjusting the colors, fonts, and spacing of your menus. Look for a "Menus" or "Navigation" section in your theme‘s settings or the WordPress Customizer.
If you want to dive deeper into custom styles, you can target your menu elements with CSS. Here are a few common customizations and the CSS code to achieve them:
Changing the background color of top-level menu items:
.main-navigation ul li {
  background-color: #333;
}
Styling the dropdown submenu items:
.main-navigation ul ul li {
  background-color: #555;
}
.main-navigation ul ul a {
  color: #fff;
}
Changing the hover state of menu items:
.main-navigation ul li:hover > a {
  color: #ffcc00;
}
Adjusting the size and position of the dropdown menus:
.main-navigation ul ul {
  width: 200px;
  top: 100%;
  left: 0;
}
To add these custom styles, you can either edit your theme‘s stylesheet directly or use the "Additional CSS" section in the WordPress Customizer. Just make sure to use your theme‘s specific menu class names and structure to target the right elements.
Recommended Dropdown Menu Plugins & Tools
While the native WordPress menu system and Navigation block are great for basic dropdowns, you might find yourself wanting more advanced features and flexibility. That‘s where plugins come in! Here are a few top-notch dropdown menu plugins to check out:
Max Mega Menu – Turns your existing WordPress menus into robust mega menus with tons of customization options. Drag-and-drop configuration makes it easy to build multi-column submenus with widgets, images, and more.
UberMenu – Another powerful mega menu plugin with a visual menu builder, responsive design controls, and conditional logic for displaying different menus to different users.
Menu Icons by ThemeIsle – Lets you easily add custom icons to your menu items for a visual boost. Supports Font Awesome, Dashicons, and custom image icons.
Responsive Menu – Focuses on creating mobile-first, customizable dropdown menus with support for hamburger toggles, slide-in menus, and more.
Each of these plugins brings something unique to the table, so explore and see which one fits your needs best. And remember, you can always start simple with the built-in WordPress options and add more advanced functionality as your site grows!
Dropdown Menu Inspiration: 3 Clever Examples
Need some real-world inspiration for your dropdown menus? Here are a few clever examples from around the web:
Airbnb: Airbnb‘s dropdowns are a masterclass in simplicity and user-centered design. The "Where" dropdown suggests popular destinations, the "When" dropdown uses a clean date picker, and the "Guests" dropdown lets you specify adults, children, and even pets. It‘s all about anticipating user needs!
Adobe: Adobe‘s products dropdown is a great example of using images and iconography to enhance a mega menu. Each product category has a bold header image and icon to help users quickly identify what they‘re looking for.
The New Yorker: The New Yorker‘s navigation combines sleek dropdowns with a touch of editorial flair. Hovering over a section reveals a featured story alongside the usual submenu links – a smart way to highlight content and encourage deeper browsing.
Of course, your dropdowns should align with your own site‘s content, audience, and aesthetic. But looking at successful examples can spark new ideas for making your navigation more engaging and effective.
Dropdown Menus for the Win!
Phew, that was a lot of dropdown knowledge! I hope this guide has given you the tools and inspiration you need to create intuitive, user-friendly dropdown navigation for your WordPress site.
To recap, the key things to remember are:
- Dropdowns help organize your content and improve user experience
- WordPress offers built-in options for creating dropdowns via the classic menu system and the new Navigation block
- Following best practices like keeping it simple, using visual cues, and ensuring accessibility will make your dropdowns more effective
- You can customize your dropdown style with CSS and power up with plugins as needed
With a little planning and iteration, you can build dropdown menus that make your WordPress site a joy to explore. Your visitors (and your conversion rates) will thank you!
Now if you‘ll excuse me, all this talk of dropdowns has me craving a good burger. 🍔 Happy menu building, friends!
Sources
- Nielsen Norman Group. (2017). Hamburger Menus and Hidden Navigation Hurt UX Metrics.
- Google Search Central. (2021). How can I improve the navigation on my website?
- W3C. (2017). WAI-ARIA Authoring Practices 1.1 – Menu or Menu bar
)