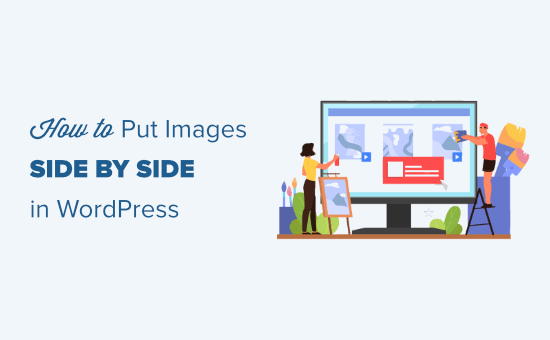
How to Easily Put Images Side by Side in WordPress (3 in a Row)
Do you want to showcase multiple images side by side in your WordPress posts and pages? Putting images next to each other, like in a row of 3, is a great way to enhance the visual appeal of your content. It‘s perfect for comparing similar images, showcasing different product angles, or highlighting a series of photos in a space-efficient layout.
While the WordPress block editor makes it fairly simple to put two images side by side, getting three or more lined up in a row can take a bit more finesse. Don‘t worry though – by the end of this guide, you‘ll be a pro at wrangling your images into neat and tidy rows!
We‘ll cover two methods in detail:
- Using the native WordPress block editor for a quick solution
- Using a dedicated WordPress gallery plugin for more advanced layouts and customization options
Feel free to use the links above to jump to a specific section. Or follow along from top to bottom for a comprehensive overview.
Let‘s get those images lined up!
Method 1: Putting Images in a Row Using the Block Editor
The WordPress block editor, aka Gutenberg, has made arranging content much more visual and intuitive compared to the old classic editor. With blocks, you can easily add images and customize their placement on the page.
Here‘s how to put images side by side in a row using the block editor:
Step 1: Create a new post/page or open an existing one
Open up the WordPress editor by creating a new post or page, or opening an existing one to edit.
Step 2: Add a "Columns" block
In the editor, click the plus sign in the top left to open the block inserter. Search for "columns" and select the Columns block to insert it:
[Insert screenshot of adding Columns block]Step 3: Select a three column layout
Hover over the Columns block and click the "Change Columns" icon. Select the three column layout:
[Insert screenshot of selecting 3 column layout]Now you have three empty columns to fill with your images.
Step 4: Add images to each column
In each column, click the plus sign to open the block inserter again. This time, search for "image" and select the Image block:
Either upload a new image or choose one from your media library. Repeat this process for the remaining two columns until you have an image in each:
[Insert screenshot of 3 images in columns]Step 5: Adjust image size and alignment
By default, your images will probably be different sizes. To make them line up evenly, select one of the images and use the toolbar controls to adjust the size:
[Insert screenshot of image toolbar]You can choose a preset percentage width, or click the pencil icon to enter a custom width. Apply the same width to all three images for a uniform look.
To align the images within the columns, use the alignment options in the block settings panel on the right:
[Insert screenshot of alignment options]Experiment with different combinations of size and alignment until you‘re happy with the layout.
Tips for Using the Columns Block
- For best results, use images with similar aspect ratios and dimensions
- Keep file sizes down to avoid slow loading times
- If your theme has a full-width page template, you‘ll have more room for fitting images side by side
- You can adjust the spacing between columns using the "Block Spacing" controls
- On mobile devices, columns will stack vertically by default for better readability
Example: Showcasing Product Photos
Imagine you run an online store selling handmade jewelry. To give potential customers a closer look at your pieces, you want to display multiple product angles side by side.
Using the Columns block, you can easily create a row of three images:
[Insert screenshot example of 3 product images in columns]This layout makes efficient use of space while letting visitors see the important details of the jewelry from different perspectives. Aligning the images properly and using the same dimensions creates a polished, professional look to build trust.
Method 2: Using a Gallery Plugin for More Options
If you need more flexibility and control over your image layouts, using a dedicated WordPress gallery plugin is the way to go. Gallery plugins offer advanced features like grid layouts, lightboxes, slideshows, and more.
For this tutorial, we‘ll use the Envira Gallery plugin as an example. It‘s a popular choice for its ease of use and wide range of customization options. The free version will be sufficient for our purposes.
Step 1: Install and activate Envira Gallery
In your WordPress dashboard, go to Plugins > Add New and search for "Envira Gallery". Install and activate the plugin.
Step 2: Create a new gallery
After activating Envira Gallery, you‘ll see a new "Envira Gallery" menu item in your dashboard sidebar. Click on it and then click the Add New button to create a new gallery:
[Insert screenshot of Envira Gallery Add New]Give your gallery a name and choose your image source. You can upload new images from your computer, choose from your media library, or import from other sources like Instagram or Dropbox.
Step 3: Select and arrange your images
After adding your images, they‘ll appear in the Gallery Images section. Here you can drag and drop to rearrange them and customize the metadata like titles, captions and alt text:
[Insert screenshot of Envira Gallery Images]Make sure to set alt text for each image to improve accessibility for visually impaired users and boost your SEO.
Step 4: Configure your gallery settings
Scroll down to the Config section to set up how your gallery will appear. The settings we care about for putting images in a row are:
- Number of Gallery Columns
- Column Gutter Width
To display three images side by side, set the Number of Gallery Columns to 3. You can adjust the Column Gutter Width to fine-tune the spacing between images.
Feel free to explore the other tabs for even more customization options, like enabling a lightbox, adding pagination, or querying specific image sets.
When you‘re finished configuring the gallery, click the Publish button.
Step 5: Embed the gallery in your post/page
Open up the post or page where you want the gallery to appear. In the block editor, search for the "Envira Gallery" block and insert it:
[Insert screenshot of Envira Gallery block]Select your newly created gallery from the dropdown. You‘ll see a preview of how it will look with your chosen settings:
[Insert screenshot of embedded gallery]Publish or update the post and check out your snazzy new row of images!
Tips for Using Envira Gallery
- Take advantage of built-in gallery templates for quick and easy setup
- Use the lightbox feature for an elegant way to showcase full-size images
- Optimize your images before uploading for faster load times
- Customize the gallery CSS to match your theme
- Easily reuse galleries across multiple posts and pages
Example: Comparing Design Options
Let‘s say you‘re an interior designer writing a blog post about choosing the perfect accent chair. You want to show your readers three different chairs side by side so they can easily compare the styles.
With Envira Gallery, you can create a simple three-column layout to display the chair images:
[Insert screenshot example of 3 chair images in Envira Gallery]Seeing the options presented neatly in a row helps your audience visualize how each chair might fit into their own space. Plus, they can click through to a lightbox for a closer look at the details.
Using a plugin like Envira Gallery provides a ton of flexibility for arranging images in any configuration you need. You‘re not limited to just putting images side by side in a row – you can explore grids, circles, slideshows and more!
Best Practices and Accessibility Tips
Whichever method you choose for putting images in a row, there are some general best practices to keep in mind:
- Optimize image file sizes for faster loading (aim for under 200kb per image)
- Use descriptive file names for better SEO
- Always set alt text on images to improve accessibility
- Test your layout on different screen sizes to ensure responsiveness
- Provide context and captions where appropriate
- Stick to 2-4 images maximum per row to avoid overwhelming visitors
- Choose a consistent style for borders, alignment, and spacing
- Make images clickable to view larger versions if needed
Conclusion
Putting images side by side is a great way to make your WordPress content more engaging and effective. Whether you‘re showcasing products, comparing options, or telling a visual story, a row of images can help get your message across.
The WordPress block editor makes it simple to put two or three images next to each other, while a plugin like Envira Gallery provides even more flexibility for advanced layouts.
Remember to optimize your images, use descriptive alt text, and keep the overall page layout in mind for the best results. With a little practice, you‘ll be creating beautiful image rows in no time!
Further Reading and Resources
- WordPress Image Optimization Guide
- How to Align Images in WordPress
- Choosing the Best WordPress Gallery Plugin
- WordPress Accessibility Basics
- 10 Tips for Better User Experience on Your Website
By following the steps in this guide and keeping the best practices in mind, you‘ll be well on your way to enhancing your content with perfectly placed image rows. Have fun experimenting with different layouts to find what works best for your unique WordPress site!
)