Seamlessly changing your live stream or recorded stream title on OBS – Open Broadcaster Software is possible. Therefore, when it gets uploaded on your preferred platforms like Twitch, YouTube, or Facebook it will have an enticing title.
If you are a content creator, you mainly look for ways to showcase your content through videos, audio, or texts. If you actively stream, then you need to have the perfect title to attract a larger audience. Whether you are live-streaming on Instagram, Twitch, Facebook, YouTube, or any other platform, you ought to ensure your content is beneficial to your audience so that they can keep coming to your profile to get the latest updates.
If you regularly use OBS to record or live stream videos, you must be wondering how to change the title to a favorable one. Therefore, you can either decide to stream through the various platforms or OBS.
What matters is that you pass the intended information to the audience. Luckily, it has a vast amount of features that can allow you to change the title even when outside the platform.
What is OBS?
OBS means Open Broadcaster Software which is an open-source tool that allows offline live-streaming and video recording. Therefore, if you are a content creator, OBS would be a great tool to utilize. Moreover, it is compatible with Mac, Linux, and Windows, so you have no excuse for not utilizing it.
Additionally, you can easily create scenes with multiple types of video sources using it. OBS allows real-time video capture, scene composition, recording, encoding, and broadcasting. Therefore, using it you can stream videos to any RTMP-supporting sites like Twitch, Instagram, YouTube, Facebook, and much more. What’s your favorite platform? Use OBS for the best video capture!
Additionally, its main interface is organized into scenes, sources audio mixer, transitions, and controls. Through the different controls, you can record a video, text, or audio, mute the audio, adjust the volume, stop or start a recording, monitor the current scene, and modify the preview of non-active scenes.
Features Of OBS
- High-performance audio/video capturing
- Set up an unlimited number of scenes
- Inituitive audio mixer
- Great configuration options
- Streamlined settings panel
How To Change The Stream Title On OBS
OBS can be used with most popular streaming and social media platforms. It has user-friendly configuration settings that you will enjoy using for the best results.
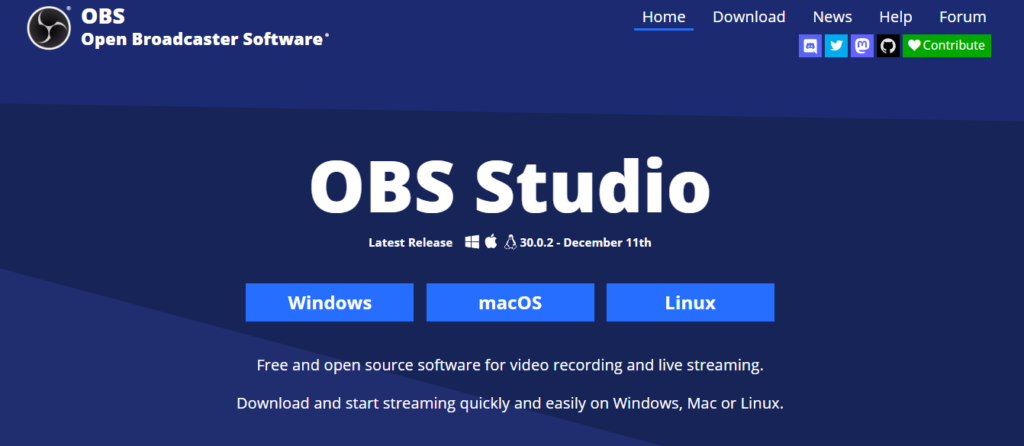
Step 1: Access OBS studio
First download or launch the OBS studio software on your Mac, Windows, or Linux platform. You need to have Windows 10 or 11 OS, or Mac 11.0 and newer. Install it and now you can start using it.
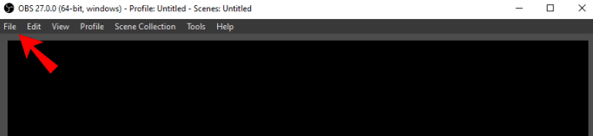
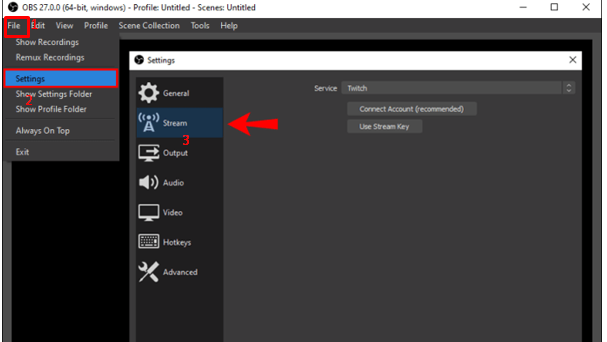
Step 2: Access the Menu Bar
Proceed to access the menu bar at the top of the screen and click on the “File” option. All the other options: Edit, View, Profile, Scene Collection, Tools, and Help are all essential.
Step 3: Choose Settings
A drop-down will appear, and you should click on the “Settings” option which will redirect you to a new window. On the left-hand side panel, choose the “stream” option.
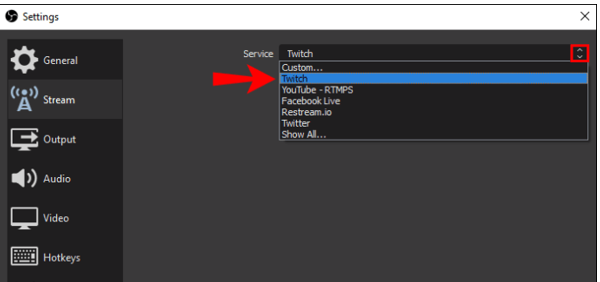
Choose the specific social media or streaming sites where you would want to send the live stream or recording. Therefore, next to the “Service” option click the downward arrow and choose a streaming site like Twitch. You are not limited you can choose any that you want.
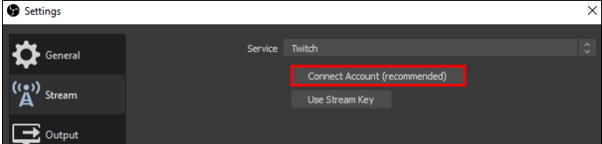
Step 5: Connect an Account
Based on the platform that you choose you can either connect your account to OBS or use your stream key. Select the ”connect account” option which is highly recommended. On the login window, enter your account’s username and password, and choose a server from the drop-down of a place closest to your location.
Step 6: Check Stream Information
Once you are done with the whole process, a new window will open, Check the Stream Information where you will find the “Title” input box. Modify it to your preferred name. You will be required to modify the Title, Go live notification, category, tags, and stream language.
What to Consider When Choosing a Stream Title.
If you want to prosper in streaming, you need to choose a title that people will be enticed to click. Therefore, before jumping into a title, there are some considerations that you need to keep in mind.
1. Audience
What is your target audience? What is trending at the moment? Why not use a title that resonates with that? However, ensure it relates perfectly to the content that you are providing. Remember that the kind of title you choose for an adult audience is not the same as for a teenage audience.
2. Content
Also, be specific about the content you are streaming. The title should be informative enough that make the viewer to either decide to check out the content or not. Also, if you are a high-ranking content creator, try to show it through the title. Don’t be too modest
3. Witty Title
You don’t have to just have a serious title, you can spice it up to be a bit witty as long as it aligns with the information you are passing along. However, ensure you aren’t seen as a joker in the long run. A bit of wittiness will be enough.
4. Showcase some emotions
In as much as you might be streaming serious content, you can try to showcase some emotions through the title. For example, “Minecraft revived my lost soul”. Additionally, you can add symbols and special characters to the title to make it look incredible.
5. Avoid offensive language
Also, do not use any offensive language in your title as it may make people think otherwise about you. Just choose a title that is calm and not offensive in any way regardless of what you are streaming.
It is important to also include tags or hashtags that can help your content to grow and spread more fiercely. Also, if you are having a collaboration with another content creator, be sure to include it in the title. This will make your fans to be enticed to want to know what the other person has to say.
OBS Studio Alternatives
If you are a content creator, you most probably look for different tools that you can use for a seamless streaming experience. If you regularly use OBS Studio, you most probably would love to know some of its other alternatives.
When choosing an alternative ensure it provides dual screen recording capabilities, whiteboard tools, no watermarks, editing tools, ease of use, and high-quality video.
OBS alternatives 1 Click Up Best for recording screens 2 Camtasia Best for creating training videos 3 Flutin Best for multi-streaming live videos 4 Bandicam Best for creating professional-looking videos 5 Wirecast Best for customizing high-quality videos 6 Streamyard Best for live talk shows 7 Xsplit Best for high-quality livestream 8 Lightstream studio Best for creating professional broadcasts 9 Streamlabs Best for customizing your stream 10 FFSplit Best for compositing many videos into a live stream.
How To Use The OBS Studio to Stream
You need to ensure OBS is set up to flow with your streaming setup. Luckily, you can use the autoconfiguration wizard to make the proper settings for your computer. The process is easy:
Step 1: Download the OBS Studio software
Step 2: Run the OBS autoconfiguration wizard
Step 3: Adjust any necessary settings
Step 4: Set up your audio input capture devices; Settings > Audio
Step 5: Also remember to add a source; sources > + > Choose your source
Step 6: Confirm all the set settings; settings > output
Step 7: Test your stream by clicking, start recording, or start streaming.
As easy as that.
Showcase Your Content in High Video Quality
If you want your audience to stick around, it is crucial to provide high-quality video content that they can watch and rewatch as they please. At the end of the day, you want to pass some information out there and try and meet the requirements of people so that they can trust your content more.
Additionally, depending on your requirements, you can choose the perfect live-streaming software that will help you meet your short-term and long-term goals.
Frequently Asked Questions
Q. What are the best live-streaming platforms?
YouTube Live, Facebook Live, TikTok Live, Twitch, Kick, Instagram Live, LinkedIn Live, X(Twitter), Livestreaming by Vimeo, Dacast, etc
Q. What features should you look for in a live-streaming platform?
Video hosting, video organization, security, monetization options, Device compatibility, stream analytics, RTMP streaming support, editing features, encoding capabilities, video cloud storage, and budget.
Q. What makes OBS stand out from Streamlabs?
It features low CPU usage and, therefore, is more favorable.