
Selenium is one of the key scraping tools for Python developers. Come in no to discover how to use it to successfully carry out your scraping tasks with fewer hassles.
The de-factor tools for scraping in Python are either the duo of Requests and Beautifulsoup or the scrape framework. These two are quite fast and easy to use until you are required to render JavaScript then you discover how unhelpful they can be.
When it comes to rendering Javascript, you will need to make use of a headless browser to access and scrape the content of interest. Different programming languages have the tool for scraping JavaScript-heavy pages meant for them. Python has Selenium as the popular option available to it.
Are you conversant with the Selenium web driver? Do you know how to make use of it? If you do know how to make use of it to scrape data from the web, then this article has been written for you.
At the end of this article, you should know how to get the common tasks done with Selenium. Tasks such as how to set it up, access web pages, find elements, click buttons, scroll, and a lot more.
An Overview of Selenium
If you visit the official website of the Selenium web driver, you will notice the phrase that says: Selenium automates web browsers; what you choose to do with that is up to you. That’s the best description of the tool so far — you just have to adapt it to your use case.
In our own case, we choose to use Selenium for web scraping. The legacy web scraping tools available to Python developers do not support JavaScript rendering. With Selenium, you can automate your favorite browser to load a page and render all of its content so you can scrape from it.
Unlike other web scraping tools that are specific to a programming language, Selenium does have support for more than one programming language.
Aside from Python, it does have support for Java, NodeJS, Ruby, and C#. You can use this tool on Windows, Mac, and Linux. In terms of the web browser you can control with this tool, the Selenium web driver can automate Chrome, Firefox, Edge, Opera, Safari, and Internet Explorer.
As you can see, Selenium is one tool you can use on a good number of platforms, browsers, and programming languages. It is quite different from Puppeteer, which is meant only for NodeJS developers that automate only the Chrome web browser.
Selenium Installation Guide for Python
One of the major issues newbies face with Selenium is its installation. The installation is not as straightforward as you will install its counterparts like Puppeteer or even the likes of Scrapy. You will have to get some things done yourself. Aside from having Python installed, you will need to install Selenium and then the specific driver for the browser you want to automate. Below are the steps to follow in other to install Selenium on your device.
Step 1: Install the latest version of Python from the official Python website. There are chances Python is already installed on your computer. However, it is most likely the Python 2 version. That is why you need to install the latest version (Python 3).
Step 2: Run the “python —version” command in your command prompt to verify the successful installation of Python before you move on to the next step.
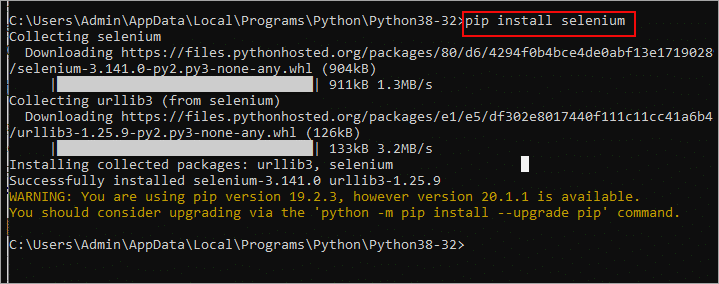
Step 3: Run the “pip install selenium” command to install Selenium. Once installation is complete, you have successfully installed Selenium. However, this does not mean you can make use of it yet. It has a dependency that you need to install, which is the web driver for the specific driver you want to install. We will be using Chrome for the automation, and as such, we have to use the Chrome web driver.
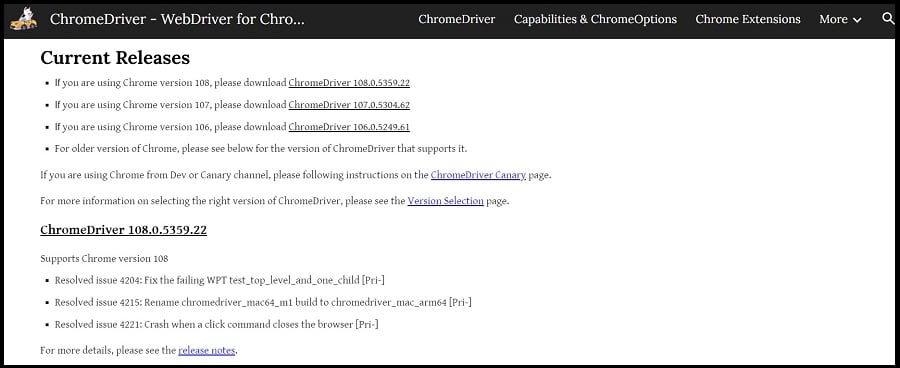
Step 4: Download the appropriate Chrome driver for your Chrome version from this page. If you download the version for another version, Selenium won’t work.
Step 5: Unzip the downloaded file and place it in a folder — that will be your project folder for this guide.
With the above, you have successfully set up Selenium and can go ahead and start automating your web scraping task in Python.
To verify installation and if everything is correct, create a new python file and run the below code.
Project for the Guide
While you can learn Selenium without working on a project by learning it piece by piece, I will recommend you learn it by carrying out some projects. For this reason, we will be carrying out a project while learning it here. The project we will work on is a web scraper that scrapes the expiration date of domain names. The project is quite easy to develop and will make for a good beginner guide. We will work you through the specific process of how to achieve some tasks in Selenium.
Solution to the Project
To develop the web scraper for this project, we need to know how it is done manually, and then automating it with Python will not be a difficult task for us. The ICANN Domain Lookup tool is one of the websites you can use to check a good number of details associated with a domain name, including its expiry date. All we have to do is visit the website, input our domain name with its extension and click the submit button. These are the actions to be replicated in code.
Step 1: Sending a Web Request
The most basic task you can carry out using Selenium in Python is to open a web page. Interestingly, it is even the first step required to automate tasks using it. This is because before you can scrape data, you must have access to the page the data of interest is rendered. Selenium has an easy method known as the “get” similar to the “get” method of the Requests module that you can use to send web requests in other to load a page. We will use the method to load the web page. Below is a code for loading the ICANN Domain Lookup tool.
from selenium.webdriver import Chrome

browser = Chrome()

browser.get("https://lookup.icann.org/en")
Step 2: Filling a Form
Another important aspect of Selenium web scraping is filling out forms. If you were using requests and Beautifulsoup, you would just add the value of the form inputs as a payload. In the case of Selenium, the page has to load, and you add the values yourself. In our case here, we are going to be adding the value as if we are typing it in from a keyboard. This is one of the advantages Selenium has — when used correctly, it makes automation look like manual work.
For you to enter the domain name into the form, you will need to know the ID or class of the search input box. To do that, check the page sure using the developer tool. For Chrome users, go to the menu, scroll down to “More Tools,” and then click on “Developer Tools”. Make sure you have the “Element” tab in focus.
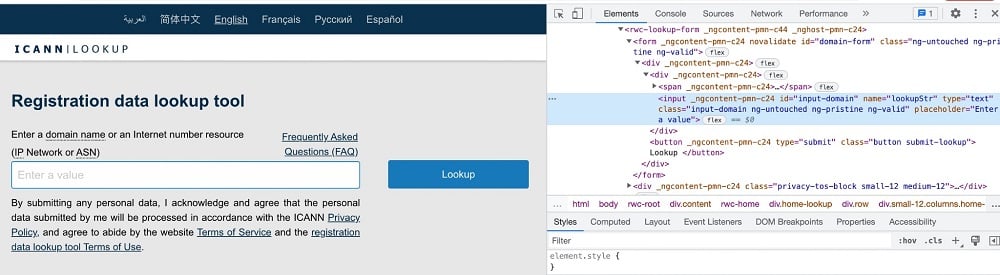
As you can see from the above, the id of the search input form is “input-domain”. To get hold of this element, we can use the find_element_by_id method on the browser element and then enter the domain using the send_keys method. Below is the code for that.
from selenium.webdriver import Chrome


browser = Chrome()

browser.get("https://lookup.icann.org/en")

searchbox = browser.find_element_by_id("input-domain")

searchbox.send_keys("twitter.com")
Step 3: Submit the Form
The way you send a form is determined by how that form is built. For some, you can use the submit method on a form. For others, you will need to get hold of the specific submit button to be able to do that. In this case, we need to get hold of the specific button.
You can see the submit button (Lookup) HTML element directly under the search input box from the screenshot above. It has the class name “submit-lookup”. We use the find_element_by_class method to get hold of it and then click the button to submit the form. Below is the code with the submit form button for the project included.
from selenium.webdriver import Chrome


browser = Chrome()

browser.get("https://lookup.icann.org/en")

searchbox = browser.find_element_by_id("input-domain")

searchbox.send_keys("twitter.com")

browser.find_element_by_class_name("submit-lookup").click()
Step 4: Scrape Domain Expiry Detail
The step is to scrape the domain expiry details. The code so far will open the page of the tool, enter the domain name and then click on the Lookup button. This will get the page of the domain details to load. Since we aren’t using the headless Chrome configuration, you will see Chrome load and all of the above take place. One thing with the domain detail page is that you need to wait for it to load. Without waiting, you can’t get the data as the page will open before the data is loaded — some kind of JavaScript rendering is at play. Selenium does provide a wait function which you will see in the code below.
from selenium.webdriver import Chrome

from selenium.webdriver.support.ui import WebDriverWait

from selenium.webdriver.support import expected_conditions as EC

from selenium.webdriver.common.by import By

from selenium.common.exceptions import TimeoutException


browser = Chrome()

browser.get("https://lookup.icann.org/en")

searchbox = browser.find_element_by_id("input-domain")

searchbox.send_keys("twitter.com")

browser.find_element_by_class_name("submit-lookup").click()

try:

    myElem = WebDriverWait(browser, 7).until(EC.presence_of_element_located((By.CLASS_NAME, 'registry-expiration')))

    c = browser.find_element_by_class_name("registry-expiration")

    print(c.text)

except TimeoutException:

    print("Something went wrong")

    browser.close()
Step 5: Refine the Code
The above code works. But it is not flexible. You will need to input the domain name anytime you need to check the domain expiry date. Let structure the code into a function so that it takes a domain name as input and prints its expiry date in the console.
from selenium.webdriver import Chrome

from selenium.webdriver.support.ui import WebDriverWait

from selenium.webdriver.support import expected_conditions as EC

from selenium.webdriver.common.by import By

from selenium.common.exceptions import TimeoutException


def domain_expiration_date(domain_name):

    """extract domain expiration date"""

    browser = Chrome("/Users/abdulwaliyahaya/Desktop/Automate/chromedriver")

    browser.get("https://lookup.icann.org/en")

    searchbox = browser.find_element_by_id("input-domain")

    searchbox.send_keys(domain_name)

    browser.find_element_by_class_name("submit-lookup").click()


    try:

        myElem = WebDriverWait(browser, 7).until(EC.presence_of_element_located((By.CLASS_NAME, 'registry-expiration')))

        c = browser.find_element_by_class_name("registry-expiration")

        print(c.text)

    except TimeoutException:

        print("Something went wrong")

        browser.close()

domain_list = ["amazon.com", "facebook.com", "twitter.com"]

for i in domain_list:

    domain_expiration_date(i)
Other Important Selenium Functions

The above is a step on how to complete the project of interest. Because we were focused, some of the key aspects of Selenium web scraping for Python were neglected. In this section, we will take a look at some of these to give you a good background of the Selenium web driver to better understand how to make use of it.
Headless Mode
There are basically two types of modes in Selenium web driver automation. There is the head mode which is the one used in the guide above. For this mode, you will see a browser UI launch and see as the browser is being automated to carry out its tasks. This method should only be used for debugging purposes. The other method which is popular in a production environment is the headless mode. For the headless mode, no browser is launched for you to see, and as such, it is faster and consumes fewer resources. Below is how to use Selenium in headless mode.
from selenium import webdriver

from selenium.webdriver.chrome.options import Options


options = Options()

options.headless = True

options.add_argument("--window-size=1920,1200")


driver = webdriver.Chrome(options=options, executable_path=DRIVER_PATH)
Selenium Page Properties
There are some specific page properties you can scrape using Selenium. Selenium makes it easy for you to access the title of a page, the current URL, and even the full source. You can also scrape the resolution of your screen and many others. Below is a code that shows you how to scrape the page title, current URL, and full-page source (HTML).
from selenium import webdriver
from selenium.webdriver.chrome.options import Options
options = Options()
options.headless = True
driver = webdriver.Chrome(options=options)
driver.get(“https://www.twitter.com/”)
print(driver.page_source)
print(driver.title)
print(driver.current_url)
driver.quit()
Locating Element on a Page
Web pages are designed using HTML markups. These are elements that specify the structure of a page. These elements have some attributes such as class, ID, and some custom attributes such as “data-**” that can be used to identify them. Once an element on a page can be uniquely identified or accessed using its class, ID, or other attributes, then locating it and scraping the text content in it becomes easy.
You can locate elements on a page by finding them using their class, ID, name, and tag, among others. Below is a code that shows you how to locate elements on a page using Selenium and Python. Without this, you won’t be able to scrape using Selenium successfully.
driver.find_element(By.NAME, 'h1')

driver.find_element(By.CLASS_NAME, 'someclass')

driver.find_element(By.XPATH, '//h1')

driver.find_element(By.XPATH, '/html/body/h1')

driver.find_element(By.ID, 'greatID')
Conclusion
No doubt, Selenium comes with some features that, when used correctly, scraping JavaScript-dependent pages becomes easier. While they are perfect for web scraping, they could also easily be detected unless you make use of some evasion techniques. It is important you know that unless JavaScript rendering is required, Selenium is not the best tool for web scraping in Python.
This is because it is one of the slowest scraping tools in Python when compared to tools that do not render JavaScript. From the above, you can tell how adaptive it is, and as such, aside from web scraping, you can use it for automation in general.
