Skype is a great application for instant messaging, voice calls, and video chats. This makes it an incredibly essential app for connecting and communicating with your friends, family, and colleagues.
It allows you to video chat using virtually any webcam, from portable to built-in cameras. It is, therefore, a frustrating experience when you have issues with your Skype camera. You’ll try calling someone, but your Skype camera won’t show video, or the person you’re talking to cannot see you. Luckily, this is an issue that you can quickly solve whether you are using Skype on your PC, iOS, Android, or Mac.
Are you unable to communicate with your family or attend a virtual meeting because Skype video is not working properly? Let’s show you how to fix this problem.
Why is my Skype Camera not Working?
There are various reasons why your Skype camera is not working the way you want. They range from using an outdated app, driver, or operating system to incorrect settings. Sometimes the camera might be covered. All in all, you can easily and quickly resolve Skype camera not working issues to get back into video calls. If you are experiencing issues with the Skype camera, read on to learn how to get your Skype app working again on your devices.
Fix Skype not Working on PC/Mac
If your Skype Camera is not working on your Windows or Mac Pc, you can try the following troubleshooting steps.
1. Ensure that you have a stable internet connection

When you have problems with your Skype camera, your internet connection is mostly the cause. Skype will disable your camera when you make calls through a poor internet connection. Therefore, you should check your internet connection, especially if your camera stops working in the middle of a Skype call. They stop working in the middle of a Skype call. Skype only enables your camera when you have a strong and stable internet connection. You can ensure that you have a stable internet connection by:
- Troubleshooting your computers network issues
- Use a strong Wi-Fi connection or use a wired connection instead.
- Closing any other applications that will reduce your network’s bandwidth. These can include streaming and file sharing applications that use too much of your internet connection.
2. Check your privacy settings
Skype needs permission to access the microphone and the camera of your PC. Therefore, if you are having trouble getting your Skype camera to work, you should permit it to access the camera.
If you are having Skype camera issues on your Mac computer, you can try the following to grant it camera permissions:
Step 1: Click on the Apple logo
Step 2: Select System Preferences
Step 3: Then click on Security and Privacy
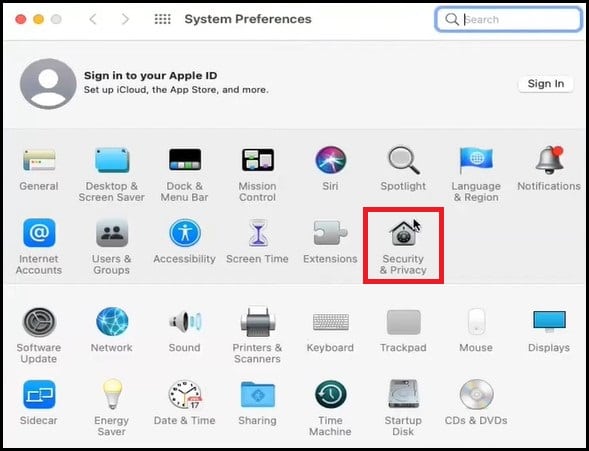
Step 4: Choose Privacy
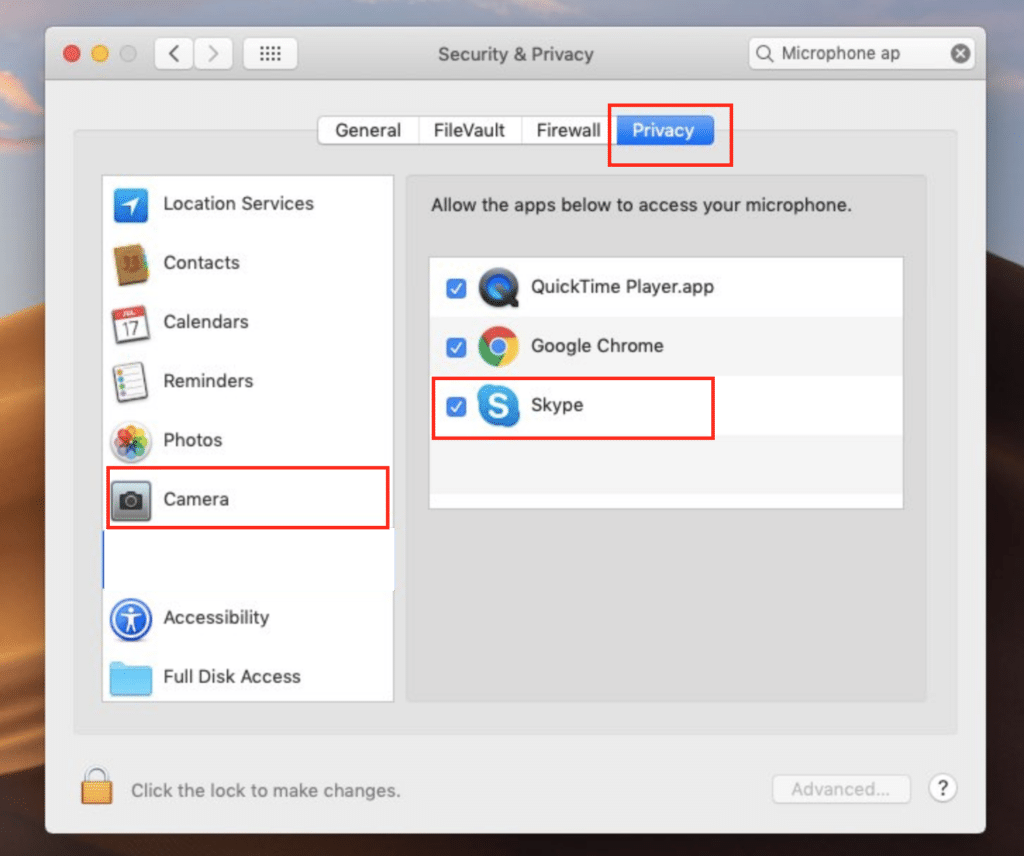
Step 5: Then click on Camera and Microphone
Step 6: Check the box for Skype
You can ensure that Skype has the necessary permissions on your Windows PC by:
Step 1: Go to the Start Menu and open Settings
Step 2: In the settings menu, click on Privacy
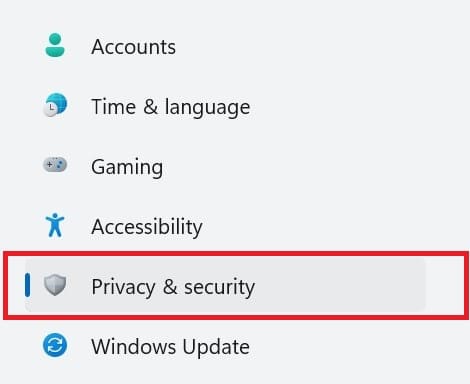
Step 3: Click on Camera
Step 4: Ensure that the switch under Allow apps to access your camera is switched on.
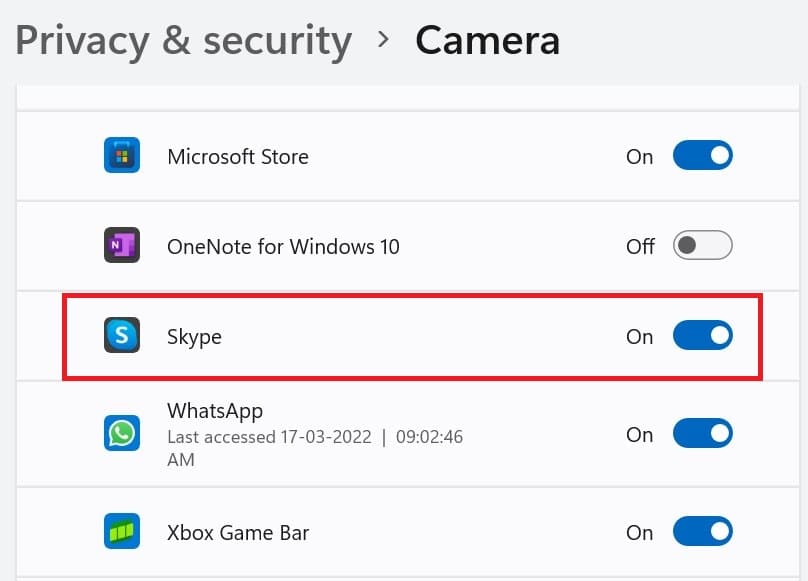
Step 5: Scroll down and toggle the switch next to Skype
Step 6: You can do the same for the microphone
After giving Skype the necessary permissions, you can restart the app, and the camera should be working as expected.
check your browser settings
If you use your web browser to access Skype, you might have blocked access to your camera for privacy concerns. That will prevent the web version of Skype from accessing your camera. Therefore, when you launch Skype, you will be prompted to allow Skype to access your camera and microphone. It would help if you chose to Allow for a Skype camera to work. Alternatively, on your Google Chrome browser, you can take the following steps to ensure that Skype accesses your webcam:
Step 1: Click on the three dots at the top right corner
Step 2: Then choose Settings
Step 3: Click on Privacy and Settings
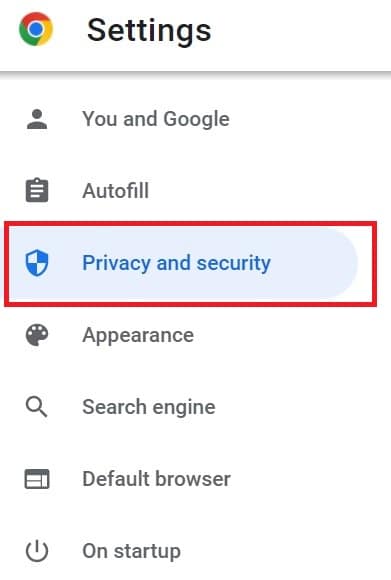
Step 4: Click on Site Settings
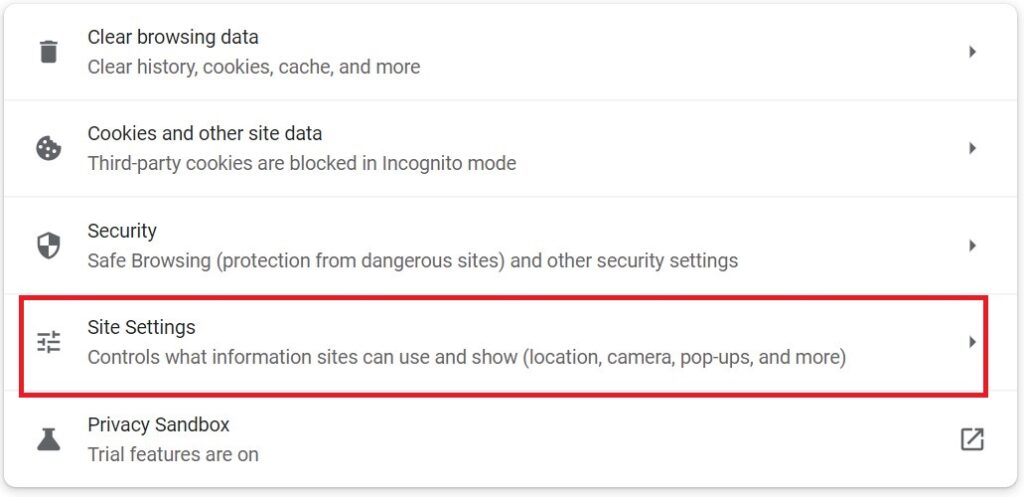
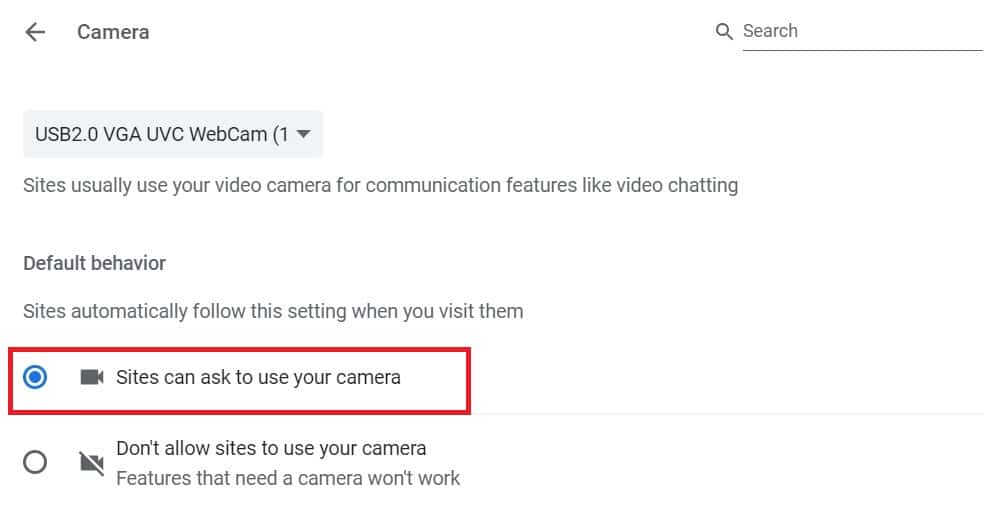
Step 5: Choose Camera
Step 6: Select the option Sites can ask to use your camera
3. Ensure that your webcam is connected to your computer
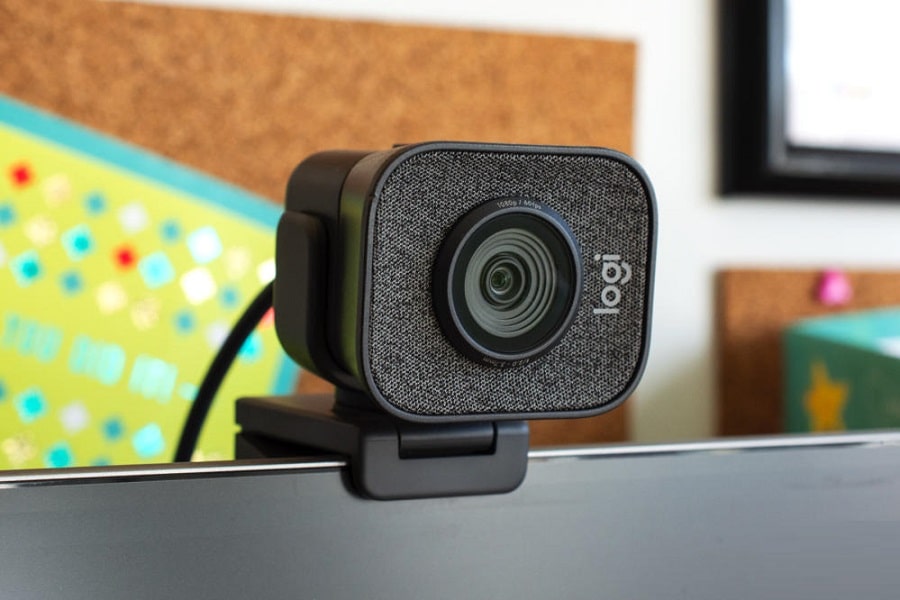
Using an external webcam instead of the built-in one, you should ensure that it is correctly plugged into your computer. Loose connections or faulty cables will prevent your computer from detecting your external webcam. After connecting it, you should also ensure that it is turned on. While built-in webcams automatically turn on when you start a Skype video call, you may need to turn an external webcam on manually.
You can then manually set up your webcam by:
Step 1: Click on the three dots
Step 2: Click on Settings
Step 3: The select Audio & Video
Step 4: Select your webcam from the dropdown menu.
4. Close any other running programs
When you have a lot of programs running on your computer, the Skype camera could stop working. This happens when another program uses the camera or refuses to relinquish control of the webcam. Multiple programs could also slow down Skype, preventing it from using all its features.
You can close all other programs that could be using the camera. If that does not work, you can restart your computer to close all running programs before launching Skype.
Fix Skype not Working on Mobile Devices (Android/ iOS)
When the camera is not working on your Skype mobile app, you can try a few options to fix this problem. They include:
1. Check network connectivity
As said earlier, slow internet connections can cause video buffering, poor video quality, or your Skype camera not working at all. Skype will turn off the camera when you have a slow internet connection. Therefore, you can check whether you have a fast internet connection. You can switch between connecting to the internet through your mobile data or a Wi-Fi network to see which option works best.
2. Check the apps permissions
Like any other app, Skype needs access to certain hardware and software components on your device. Skype cannot work on your mobile device unless you give the app permission to access your camera. The camera helps you make video calls, while access to the microphone helps you talk to the person you’re calling.
You can give Skype access to your camera by:
Step 1: Open the Settings App on your iPhone
Step 2: Find the Skype app from the list of installed apps
Step 3: Tap on the switches next to the Microphone and Camera to enable them
How to check Skype permissions on your Android device
On your Android device:
Step 1: Launch the Settings App
Step 2: Tap on Apps & notifications
Step 3: Tap on App info
Step 4: Choose the Skype App
Step 5: Under Permissions, allow Skype to access your Camera and Microphone
After giving it access to these vital permissions on your device, you can now launch the Skype app.
3. Update the Skype app

When you run an outdated and buggy version of the Skype app, it could cause some of the app’s functionality not to work, including the camera. You should ensure that you have the latest version of the app installed on your device. To update the Skype app:
Step 1: Launch the Google Play Store or the App Store on your device
Step 2: Search for Skype
Step 3: Tap on the Update button if an update is available.
4. Force stop, or delete and reinstall the Skype app
The Skype app camera might not work on your Android or iOS device because of a minor issue with the app or firmware. The best way to solve this is to force restart the skype app through your device’s settings. If completely killing Skype and restarting it does not work, you can opt to delete the app and reinstall it. Reinstalling the app could solve a lot of issues within your Skype app.
Test your Skype Camera
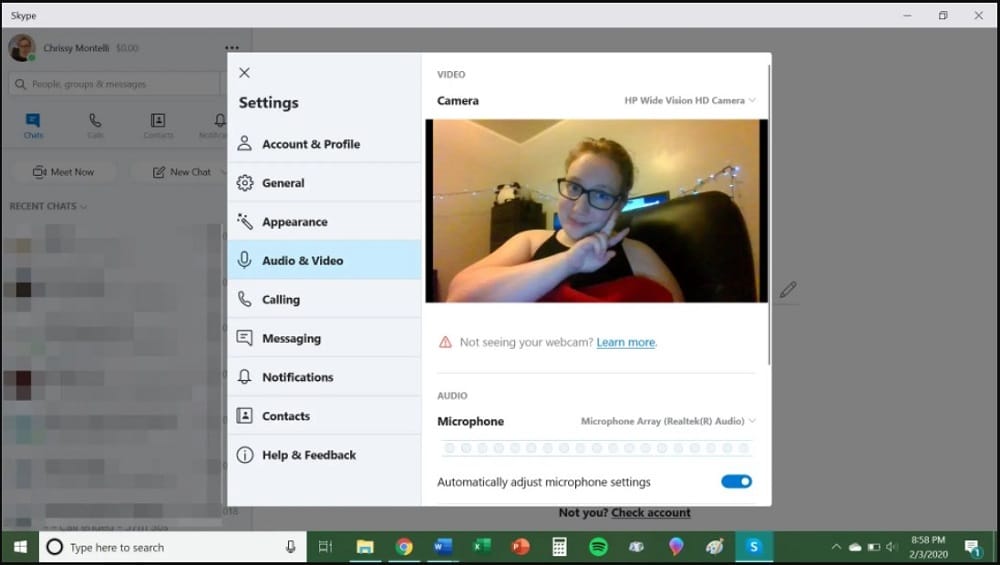
After troubleshooting your Skype camera, you can test whether it is working as expected or not. To do this, you can have a Skype test video. To test your camera on the desktop version of Skype:
Step 1: Click on your Profile Picture
Step 2: Click on Settings
Step 3: Then click on Audio & Video Settings
Step 4: Then click on Video.
You should see yourself in the Skype camera preview. That means that your camera is now working perfectly.
Conclusion
When your Skype’s video functions encounter errors, work through the list of solutions and tips above to fix the issue. However, it would help if you first understood the actual cause of the problem to fix it quickly. If you are unsure of the problem, work through the given solutions until the video call feature starts working as expected.
