
Do you want to add proxies to your Android device to route your requests via the proxy? Then come in now and learn how to get that done via 2 methods that have been tested and trusted over the years.
Some websites or apps restrict users from certain locations from getting access to their websites or services. Now, how do you gain access to a website with a geolocation-restricted? To bypass these restrictions and get access to a website or app, you need to add a proxy on your Android. In this article, we shall be highlighting the various methods of adding a proxy to Android. The proxies that you will be adding are left for you to decide. But first, let’s quickly examine why you may have to use proxies on Android
Why Use Proxies on Android?

When the term “Proxy” is mentioned, most people always think of only computers. Meanwhile, as more people use smartphones to access the Internet, proxies on Android and iOS devices have become relevant. We shall be focusing on why it is important to use a proxy on Android. There are various reasons why people may want to use a proxy on their Android, the reasons vary from user to user.
Blocking Your Location
Android devices are known to sync with Google, which often has several apps keeping tabs on your location. Sometimes users are not even aware that their location is tracked. But apps and services offered by Android have put location service in place as part of the terms and conditions of using their service. The problem is that your location could be shared with third parties or hackers who are determined to cause harm. That is where proxies come in. They mitigate such occurrences by masking your location, giving off a different location in the worst cases.
Getting Access to Geo-restricted Content

Some websites restrict access to users from certain locations for reasons best known to them. If you are using a proxy, this will not be able as you can bypass this restriction and get access to their data as though you reside in that country, or are one of the countries granted access. How is that possible?
When you use a proxy, your original proxy is automatically masked, and you now have a new IP that is accepted into the platform you are trying to gain access. To do that, you’ll have to set up your IP to the location you are getting access to get content. Some businesses too use proxies for this reason. In their case, however, they want to keep up to date with what their competitors are doing to stay relevant in the market.
Managing Social Media

If you manage multiple social media accounts for business or fun, then you have to work hand in hand with proxies to keep you secured. Usually, most social media frown at users who operate multiple accounts with the same IP. Instagram for instance allows two to five accounts on a single device. One more account on that device will earn the user account or IP ban (as they deem fit). Using mobile proxies is one of the best ways to avoid a ban.
Methods for Adding Proxies on Androids

Setting up proxies on your Android helps you bypass geo-restrictions and get content to local data. Not only that, your device’s IP is masked, keeping you anonymous so through your operations. Your real IP remains undetected because Internet traffic passes through the proxy server before getting to the desired location. There are several methods to add proxies on Androids, but we shall be discussing 2 methods, as well as the steps in setting each one up, in this article.
Default Proxy Settings
So many people are not aware that there’s a provision for setting up proxies using the device’s default settings. We could tie the reason to the fact that most smartphones come with default settings, so you may not need to do extra settings. Of course, there’s an exception to that, which is if you prefer that traffic passes through the proxy. That said, let’s find out how to set up a proxy on default. Method. Note that this only works for mobile data and not WiFi.
Steps to Set Up Default Proxy Settings
Step 1: Go to Settings
Step 2: Select Network and Internet
Step 3: Select Mobile Network
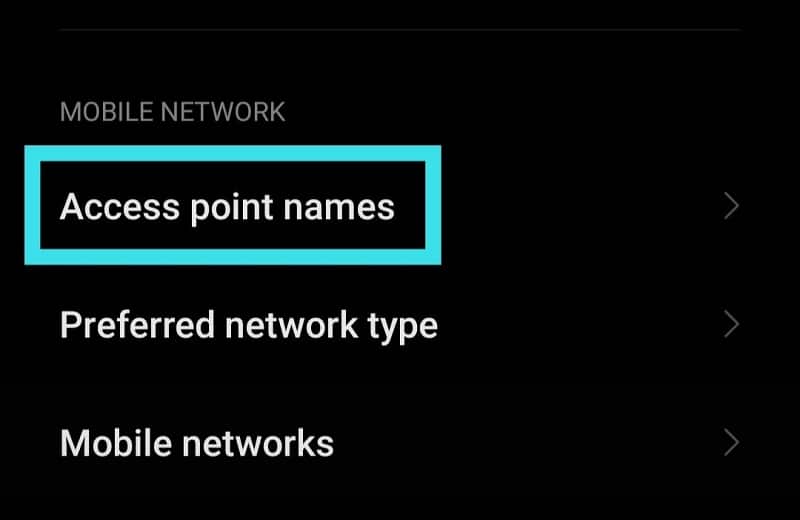
Step 4: Select Advanced and then click on APN (Access Point Names)
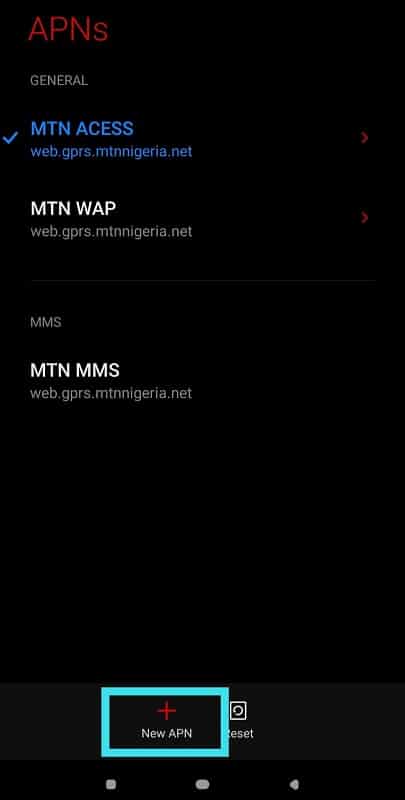
Step 5: Using the + sign at the bottom of the screen, you can create a new proxy if you do not want to edit the existing one
Step 6: Focus on these four fields: proxy, port, username, and password
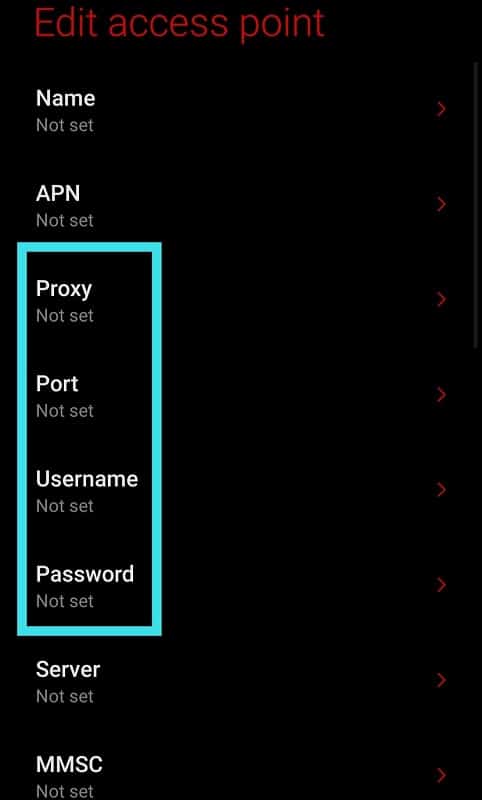
Step 7: Fill these areas with the details of your proxy.
Step 8: You may not need to bother about username and password if you plan to use IP authentication. You only need to ensure that your Android device is whitelisted for the right IP from your proxy dashboard
Step 9: After inputting the IP details of your choice, save your settings by clicking Save. Now turn off your mobile data (if it was turned on before now) and turn it back on
Step 10: Henceforth, all your Internet traffic will pass through the proxy you have just created rather than directly through your mobile device
Strengths of Default Proxy Setting
- Easy and Quick Setup: Default proxy settings are quick to set up. The major requirements are the proxy details and your ability to input them in their respective fields during set-up. The above steps should guide you on that.
- Doesn’t Require Sophistication: Default proxy settings don’t require high-level technical know-how to set up. With the basic ability to follow instructions, you can get it running.
- No Applications Required: The set-up does not require you to get any application to get it running. All the settings are done on your Android device without a third-party app.
Weaknesses of Default Proxy Setting
- Doesn’t Work for all Apps: Some apps do not use proxies or may not have an interface to configure proxies. This means that those apps can resist your proxy set-up because the application’s traffic doesn’t pass through your proxy server.
Using Postern App
The postern app is a very popular Android proxy and VPN management app. Postern helps traffic go through proxies you have configured. Let’s just say it is the Proxifier of Android. Unlike default proxy settings, it does not leave your applications out as traffic from apps passes through your configured proxies, whether such applications support proxies or not.
The postern app is best for setting up proxies on Android because it works from the system level as against working from the application level. This means every web service or app’s traffic on your Android is directed through the proxies you have set up, with credit to the postern, of course. Yes, it works on all applications, but it also allows you to exempt certain apps of your choice. You can configure more than one proxy and which proxy serves what function.
The following proxy/tunneling is supported: SSH tunneling, Shadowsocks, SOCKS5 proxy, and HTTPS/HTTP CONNECT method tunneling.
Steps to Setting Up Postern on Android
Follow the steps below to set up Postern on your Android device.
Step 1: First, you need to visit Google PlayStore to download the Postern app if you do not already have it. Simply click Install on PlayStore to download
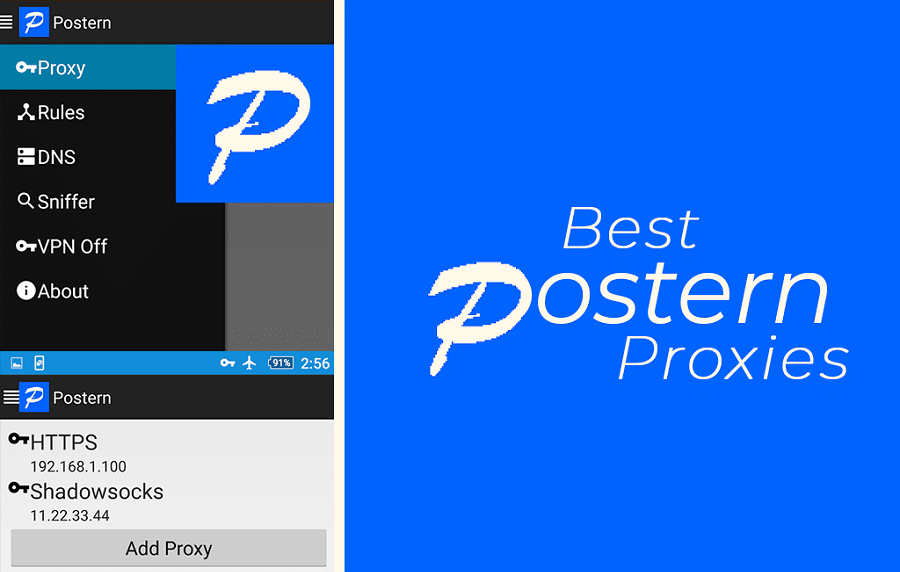
Step 2: Open the app and click Add Proxy.
Step 3: Your field of concentration includes Server Name, Server Address, Server Port, and Server Type. Using the details of your proxy, fill up the fields with their respective information
Step 4: Enter your login credentials under Username and Password. For this to work, you must first type customer before you type in your username. For example customer – bubblejohn
Step 5: Click Save
While it is okay to use datacenter on Postern, it yes not suitable for most of the popular web services. Therefore we recommend residential proxies for your set-up.
Strengths of Using the Postern App
- Forces All Apps Traffic Through Proxies: Whether or not an app on your device supports proxy or not, Postern forces traffic from such apps through your proxies.
- Works from System Level: Everything that uses the network on your device is forced to obey the proxy set-up you have done. Unlike other methods where traffic begins from the application level, Postern performs a complete sensitization on all apps or web services on your Android.
- Accepts Multiple Proxies: It does not matter how many proxies you have, Postern allows you to set up as many proxies as you want. It even lets you apportion proxies to certain websites just as you deem fit and vice versa. For example, you may decide to leave some apps such as your trading apps out of your proxy because proxies might not be necessary for such apps.
Weaknesses of the Postern App
- Requires Only Suitable Proxies: If the proxies you are using are not authentic enough, Postern cannot cover you; your IP or other important Internet information will still be revealed.
- Does not Come With Built-in Network Provider: Postern does not already have proxies lined up for you to choose from. This means you have a source for your proxies yourself before setting up on the Postern app.
Conclusion
Many users get access to the Internet through their smartphones as against using a computer system. Thankfully, you no longer have to own a computer system to bypass website restrictions to get access to local data since your smartphone is capable of using proxies. The methods above are the methods you should use to configure proxies on Android.
